A follower on Gumroad is someone whom you can send email notifications or updates to via Posts or Workflows. A follower may or may not be your customer yet.
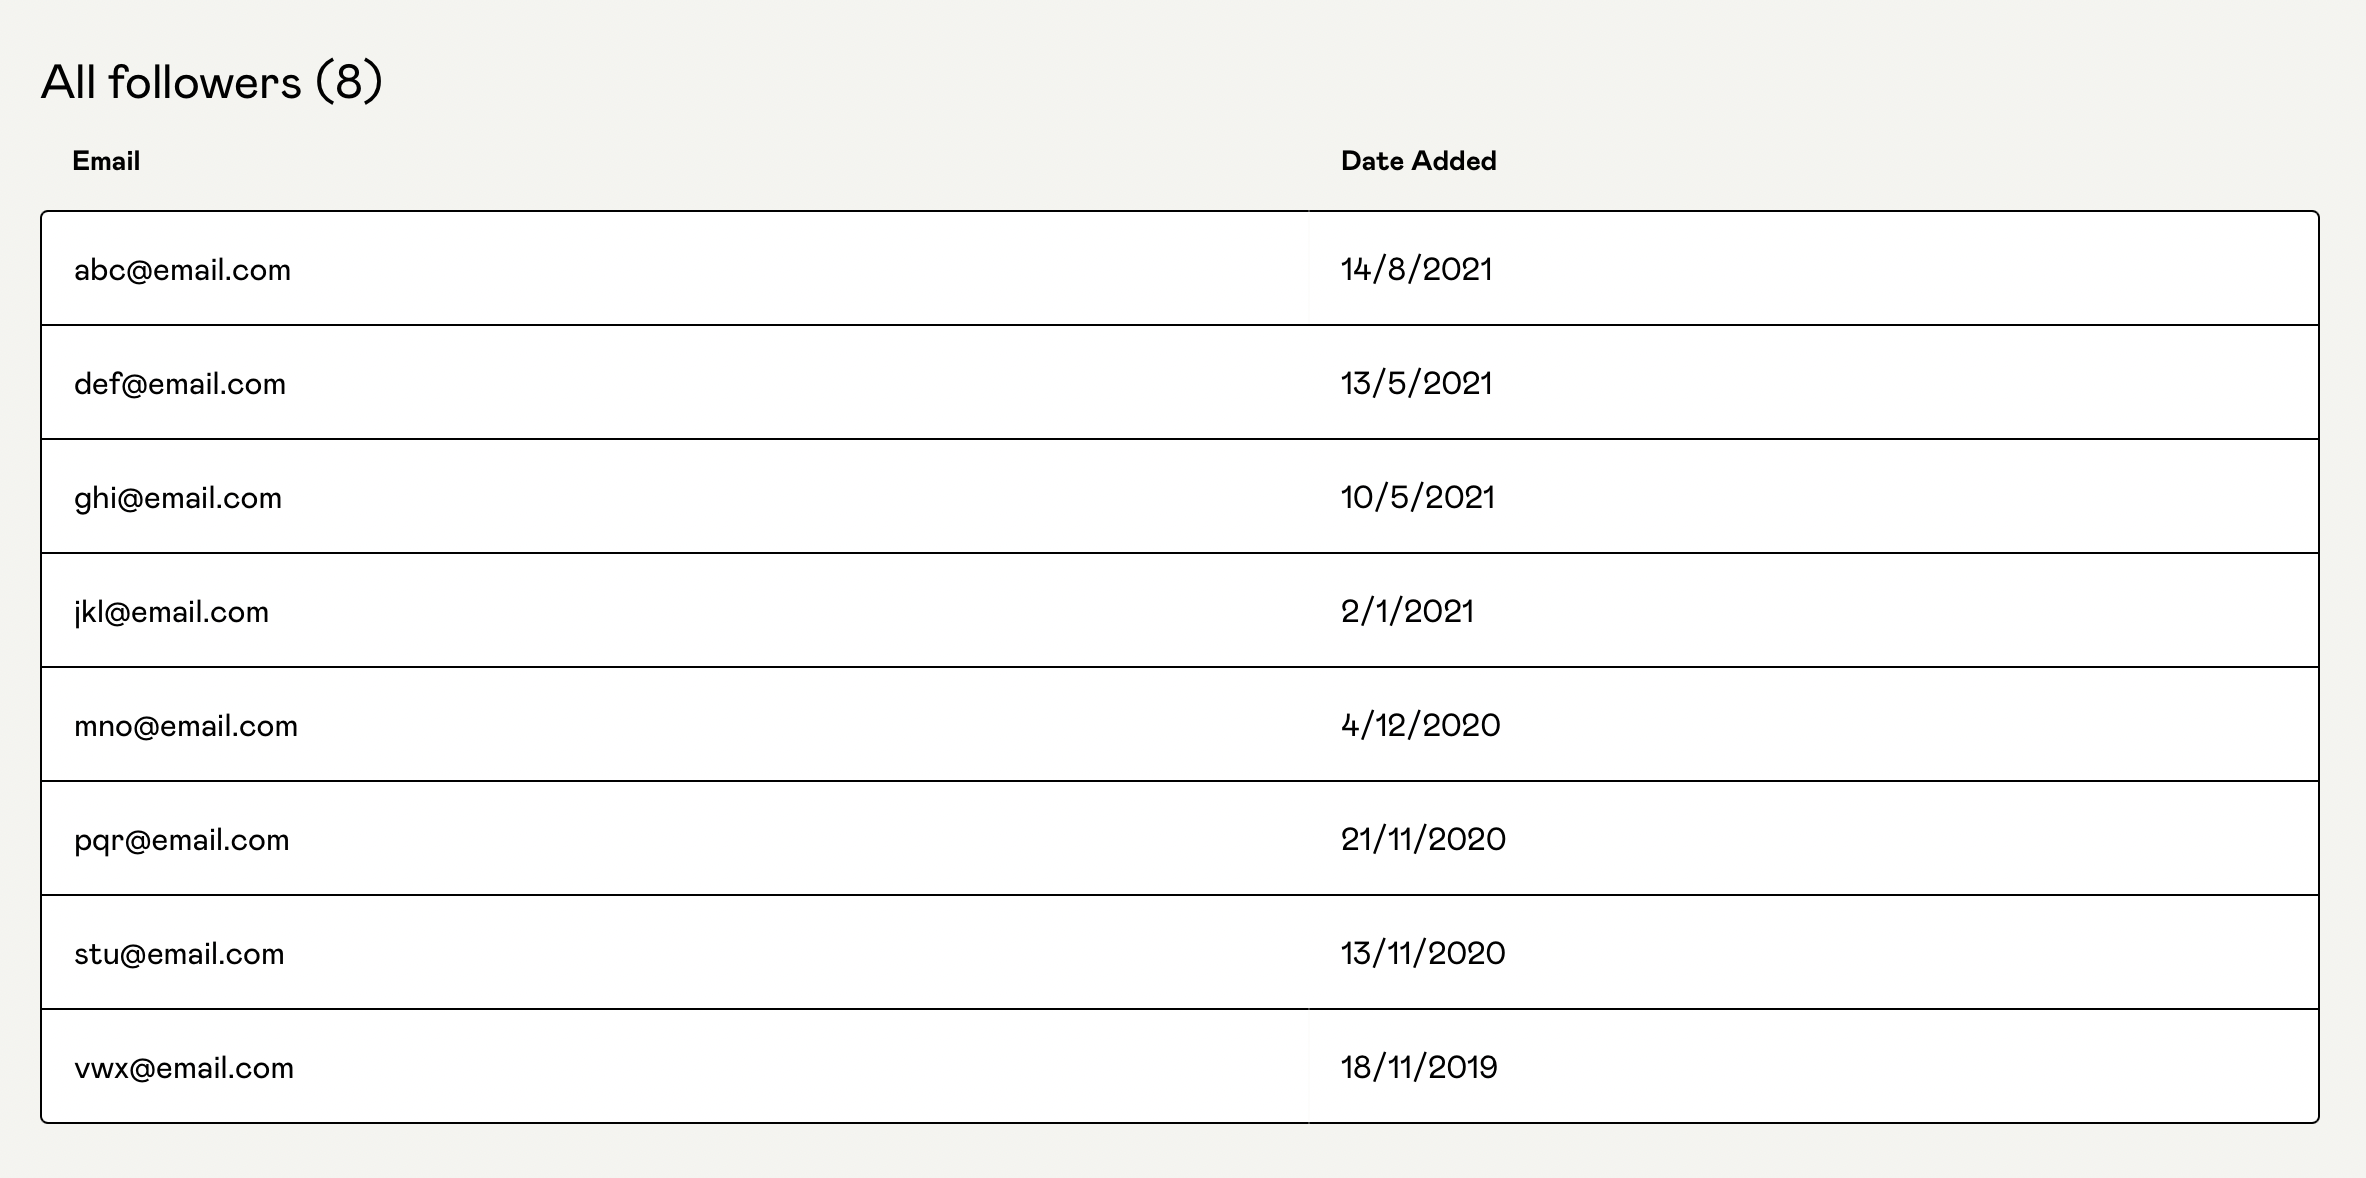
To see all of your followers, simply go to www.gumroad.com/followers, where their email addresses are listed. You can export a CSV of all your followers from that page, and even delete an email from your list.
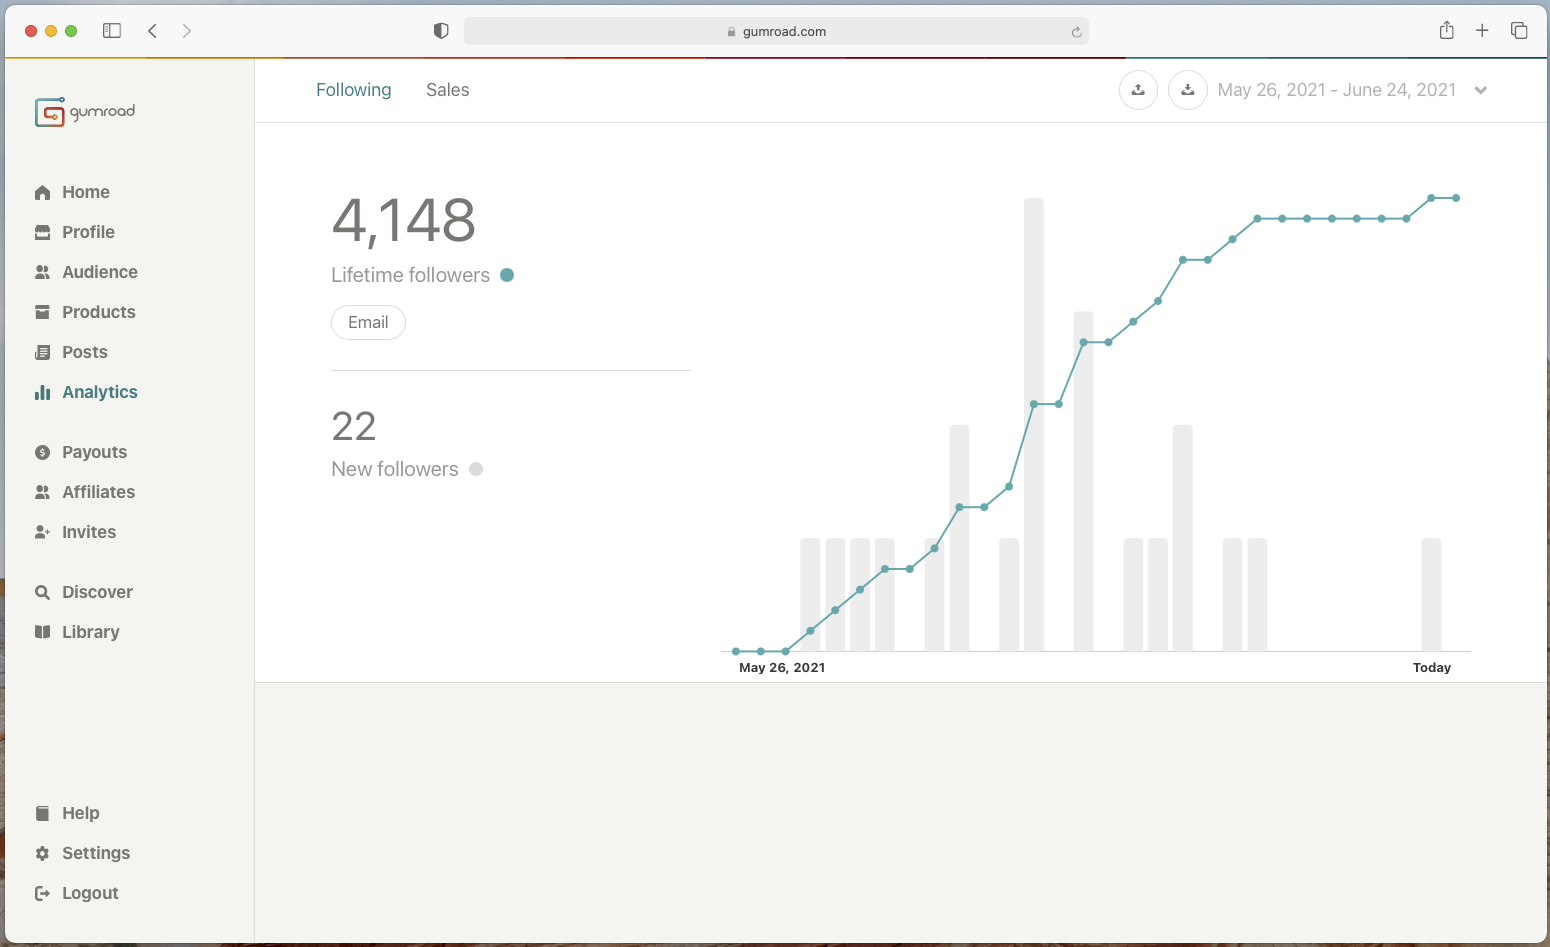
To see how your followers have increased over a period of time, and import/export followers, you can go to the Following dashboard:
Your Follow Page
You can grow your following without creating a product, and your followers don’t need to create Gumroad accounts to learn about what you’re up to. Put simply, the Follow page is like your newsletter’s landing page.
The URL for your Follow page will be {username}.gumroad.com/follow. You will find your username in your Settings in the “User details” section.
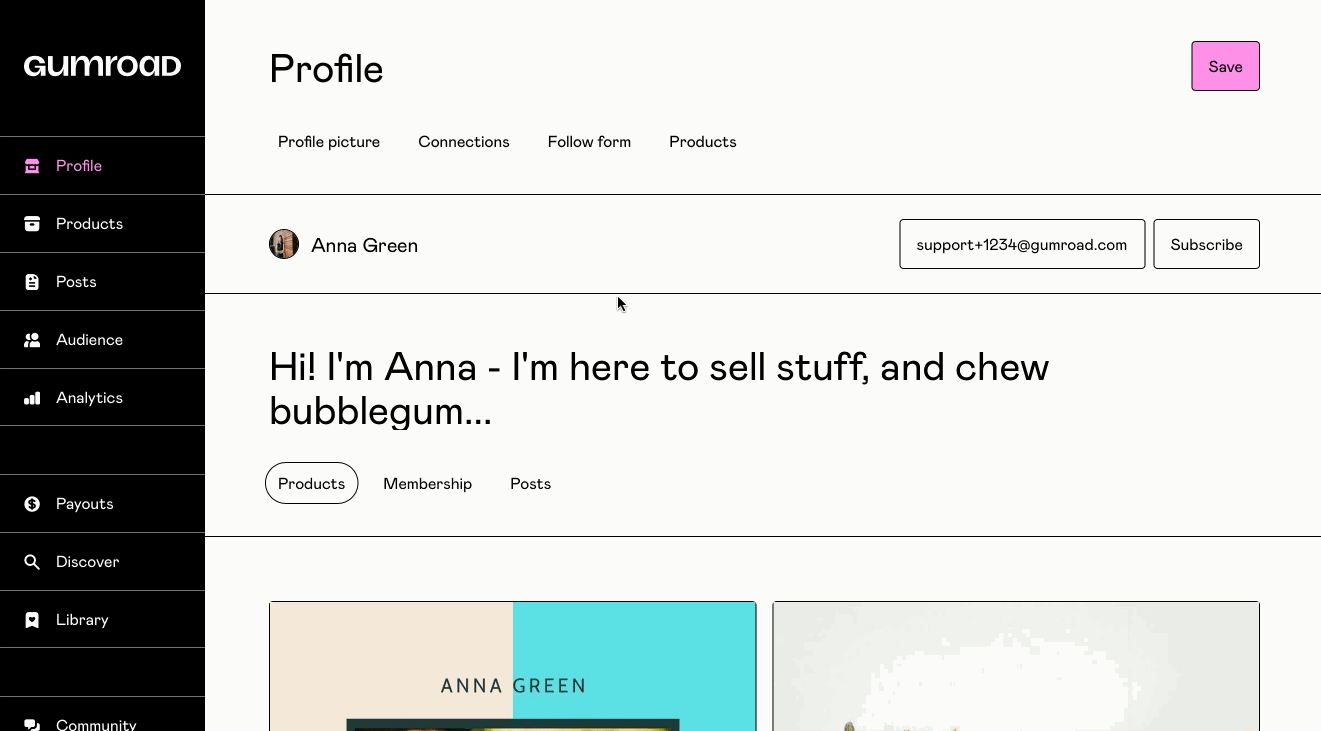
 Alternatively, you can also go to your profile > Click on “Follow Form” > and hit the “Copy link” button to copy the URL of your Follow form to the clipboard. Your Follow page will look something like this:
By sharing your Follow page, you can build an email list that can come in handy to share all future Gumroad posts and product launches.
People can also follow you from your profile page. Here’s an in-depth help doc on how to customize your Profile page: Your Gumroad Profile Page
Embedding your follow form on your website
If you want to get people to follow you without sending them to your Gumroad page, you can embed your signup form onto your own website.
From your profile, click Follow form and then copy the HTML code.
You’ll need to be able to edit the raw HTML of your web page to add the form. Please check your sitebuilder’s help documentation to assist you with this.
When you paste the HTML code, you’ll be able to edit the attributes (such as color, wording, font types, and size) to better fit into your site’s theme.
Sending posts to your followers
To send out a post to your followers, you can go to your Posts dashboard and click New post.

Under Audience, you can choose to send this post to your Followers only, to your Customers only, or to Everyone. You can also choose several other parameters to narrow down your target audience even further. Learn more about Posts

Write your message, upload as many files as you like, and choose to publish now or schedule for a later date.
Using workflows to keep followers engaged
Make sure your new followers receive an email from you as soon as they subscribe by creating a Workflow. Workflows are a series of automated emails that are sent to your followers relative to the time they sign up.
Access your workflows tab in your Customers dashboard. Click the green New workflow button to start a new workflow. Give it a name (only you will be able to see this), then select your Audience (in this example, Followers only).
Click Add, then Add email to add your first message. If you want your followers to receive the message immediately after they follow you, set the timing of the first email to 0 hours after follow.
 If you want the workflow to be sent to new followers only, click the Only send to new followers checkbox under the Content box. If this box is unchecked, the workflow will be sent to all previous followers.
You can test out what timing, subject lines, or offerings work best with workflow email analytics. On your Workflows tab, you’ll be able to see your open and click-through rates. Learn more about workflows.

Managing your following
On the Following dashboard dashboard, you can import a CSV of contacts to add to your Gumroad followers list, or export a CSV of your existing followers. Simply click the Import and Export icons next to the dropdown date menu.

Importing
If you have existing followers from another mailing list, you can import them into Gumroad and contact everyone in the same place. Just click the Import button on the Following dashboard, then download the template CSV.

Note that the only way you can properly import an existing list of followers is to upload the template CSV with the header intact. You cannot alter the header in any way — just add all the email addresses of your followers in the 2nd row, beneath the Email header.
Also, if you are on our new tier-based pricing structure, you will be able to import followers only once you’re on the 7% tier or higher. To prevent spam, the import followers feature is disabled for creators on the 9% tier.
Exporting
Click the Export button to export a CSV of your followers, from the specified timeline that you have selected. The CSV will contain the followers’ email addresses and the date that they began following you.
If someone chooses to unsubscribe, they will be automatically removed from your followers list.
Viewing and Deleting
You can view the email IDs of all your followers and the date that they followed you on the Followers page. You can also access the page by first clicking on “Audience” on the vertical nav menu, and then “Followers” on the subnav menu.
If you wish to delete a follower from your list, simply click on their name and then delete them from the right-vertical menu that pops-up.