The product summary and details
Along with your cover image or video and awe-inspiring product description, it’s a good idea to change the attributes of your product. In the section under Summary on the Product page, you can edit this information.

Add more details by clicking Add detail. Delete them by clicking the red X.
After clicking Save changes, the changes will go live, and your product’s description will now be complete. Now you can go ahead and edit the Payment form.
The payment form
While editing your product, go to the Checkout tab. This is where you can edit how customers will navigate your payment form and what they see as they buy the product. As you edit the page, you’ll see a preview in the corner of the screen.
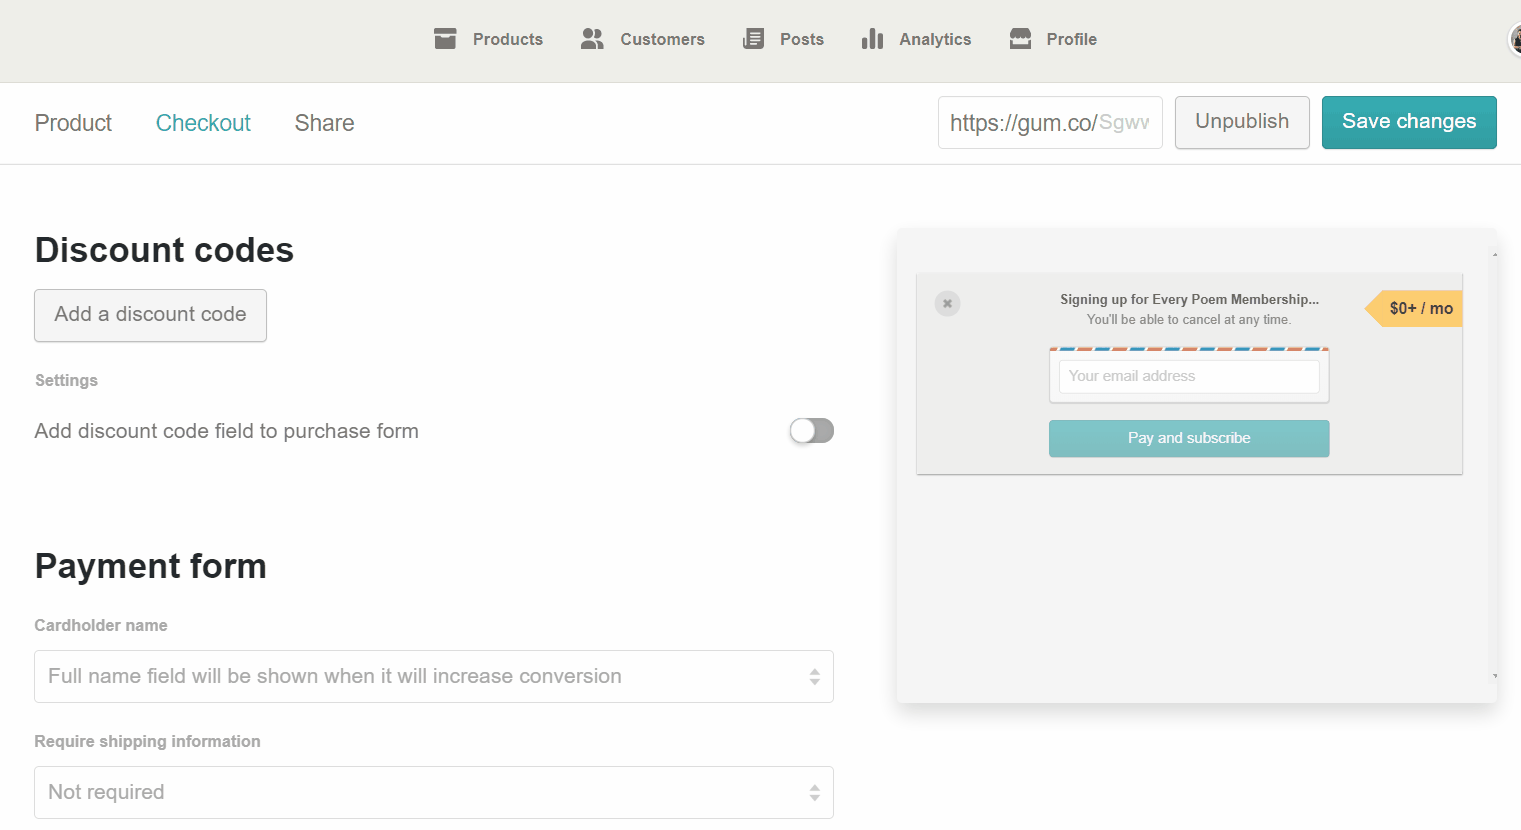
As you edit the page, you’ll see a preview in the top-right corner of the screen. Click the diagonal arrow in its top right corner to launch a new tab with the actual product page.
Click Save changes to save.
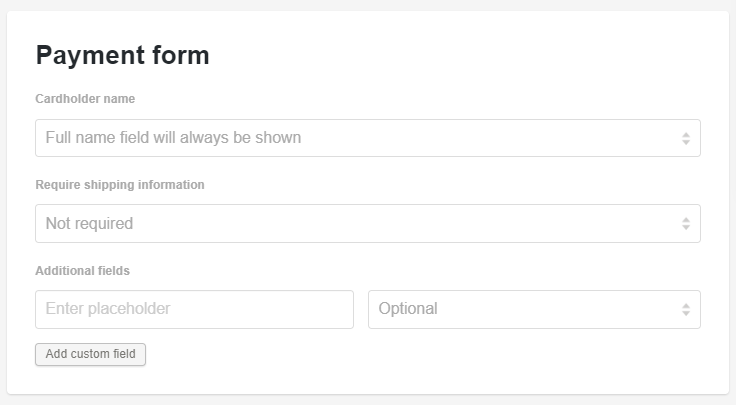
Cardholder name
Gumroad by default optimizes your payment form to increase sales on all devices. We’ve found that conversion rates are impacted when customers are forced to enter their full name on mobile devices, but unaffected on desktops (see below).
When a customer lands on your product page from a mobile device and isn’t required to enter their full name, we won’t force them to enter that field, thus increasing your sales!

In the Cardholder name field you can select the behavior you’d like on your purchase form.
You might need a customer’s full name if you are:
- Building a mailing list and want to personalize your emails to customers
- Offering a free product and want to know who’s taking advantage of this smokin’ deal
- Verifying that your high school crush has finally noticed your creative endeavors
Click it again to Never show the name field – for mobile or desktop, for times when you are:
- Trying to reduce the number of fields your customers have to fill in
- Offering a free product and don’t care who’s taking advantage of this smokin’ deal
As seen above, you can also require a shipping address on your sales – even digital sales.
Custom Fields
Creating a custom field on your purchase receipt for the purposes of getting more information from your customer – i.e. their preferred T-shirt color, their shipping address, or their A/S/L – is easy!

Under Additional fields click Add custom field. Enter the message you want your customers to answer, and click the box to require that box to be filled out before purchasing.
All of this information will be available in any CSV you download from your Customers tab. Learn more about exporting customer data here.
Click Save changes to save changes. To delete a custom field, simply click the red X.
Receipt
To leave a message for your customers, or provide them with important links or even offer codes for other products of yours, go to the bottom of your Checkout page and add a message in your receipt box.

As always, click Save changes to save your changes.